I made a roasted chicken for Domenick and figured a soup would be a great way to use the leftovers. I was in the mood for a soup with an Asian flare so I came up with these recipes.
Asian Style Chicken Soup
1tbs of canola oil
½ medium onion
1 leek sliced
3 cloves of garlic
¼ of mirin
¼ of soy sauce
1 box of low sodium chicken stock
1 large piece of ginger (a nub) with the skin removed
1 sprig of lemongrass
Pepper to taste
2 ½ cups of shredded chicken
1 cup of fresh snow peas
½ package of frozen peas and corn
3 ½ small grated carrots
Slices of green onions and sprigs of cilantro for garnish and flavor
First start by prepping all of your veg and shredding your chicken. This will make the soup easier to deal with. Add to a large soup pot 1-2 tbs of canola oil on medium. Then add your diced onions and leeks. Then grate in your garlic with a microplane or finely dice it. Sautee until veg is translucent. Then deglaze the pot with the mirin and add your stock. Season the stock with pepper, soy sauce, lemongrass, and ginger. Whatever you do, do NOT add salt. Let this simmer for 15 minutes and then add the shredded chicken. Let simmer for another 15 minutes until the flavor comes together. Next add 1 cup of fresh snow peas, ½ pack of frozen peas and corn, and grated carrot. Feel free to use other veggies if you’d like. The veggie soup recipe below includes different veggies. Simmer for 10 minutes making sure the veggies are not getting too soft. Then fish out the lemongrass and ginger. You top some noodles with the soup or eat it plain. I preferred it plain but my husband likes noodles. Garnish with green onion rings and sprigs of cilantro.
Asian Style Vegetable Soup
2 tbs of canola oil
½ medium onion
1 leek sliced
3 cloves of garlic
5oz of fresh sliced Shitake mushrooms
¼ cup of mirin
¼ of soy sauce
1 box of mushroom stock
1 large piece of ginger (a nub) with the skin removed
1 sprig of lemongrass
Pepper to taste
1 cup of fresh snow peas
2 heads of torn baby bok choy
½ package of frozen peas and corn
3 ½ small grated carrots
1 tsp of fresh grated Serrano chile (adjust the amount for the spice level)
Slices of green onions and sprigs of cilantro for garnish and flavor
Once again make sure to prep your veg. Add 2 tbs of canola oil to a large soup pot on medium. Add your diced onions, leeks, and mushrooms. Then grate in your garlic with a microplane or finely dice it. Sautee until veg is translucent. Season the stock with pepper, soy sauce, lemongrass, and ginger. Whatever you do, do NOT add salt. Simmer for 30 minutes then add all of the veg, bok choy, snow peas, peas and corn, carrots and Serrano chile for some heat.
Overall, my first attempt at making an Asian style soup was successful. My parents loved both versions, Domenick loved the meat version (he would not try the veg version because he despises mushrooms) and I loved the veg soup. It was a great way to warm up a cold winter night and great as leftovers. This is a great soup to play around with. You can use any type of meat or veg stock and any type of veggies you enjoy. Have fun and let your mind create!
When it starts getting cold outside I constantly crave soups and stews. They just seem to warm me up in a way other hot foods just cannot. After going to South Philly Taproom and enjoying their fabulous tomato soup, I decided to create my own tomato soup. This is only the second time I’ve made tomato soup, because the first time I made it, it just tasted like sauce, the key for me is using butter or a butter substitute instead of olive oil, adding brown sugar and milk, because that’s what distinguishes it from sauce.
Roasted Tomato Soup
3 cans of fire roasted diced tomatoes and the juice (the ones I bought also had roasted garlic in it)
1 can of diced tomatoes
3 tbs of butter
½ a medium onion (more if your roasted tomatoes didn’t include onion)
5 cloves of garlic (more if your roasted tomatoes didn’t include garlic)
A pinch of Italian seasoning
¾ of a bottle of beer
A few tbs of brown sugar to your liking to bring out the sweetness in the tomatoes
3 cups of milk
S & P to taste
Start by sautéing the onions and garlic in butter. Once these are lightly browned add in your canned tomatoes, Italian seasoning, beer, brown sugar, salt and pepper and simmer for 30 minutes. Then puree your soup with either an immersion blender or a regular blender. Add in Milk and simmer for another 15 minutes. Now you have a quick and easy tomato soup! Serve with grilled cheese and a beer of course!
For the grilled cheeses
I used Rosemary Bread from Whole Foods for mine with Colby and Munster Cheeses. For Dom’s I used Whole Foods French banquette and the same cheeses.
My husband left his credit card in Olde City so we figured we’d go pick it up and get something to eat while we were down there. There are so many amazing places to choose from when venturing into olde city but I knew I wanted to eat at Amada. I love Jose Garces, his food is amazing no matter which one you choose! The best thing about Jose Garces is that he is ALWAYS willing to accommodate vegetarians.
Domenick was a little apprehensive when he first looked at the tapas menu at Amada. He said there was nothing on there for him, but I told him not to be overwhelmed by the vast menu options. He then looked at the menu again and chose a few dishes that suited him. To drink we chose the Temporada Sangria (seasonal sangria: white wine with peaches, ginger brandy and mint). It went down too smoothly if you know what I mean! Our waitress brought us a complimentary plate of bread crisps, tuna with black olive oil for dipping and a special roasted red pepper dip made for vegetarians.
Bread Crips with Tuna on left and Roasted Red Pepper on Right
We started off with the Aragones cheese that comes with white sangria honey and golden raisins. The cheese was great but when paired with the sangria honey and golden raisins it was amazing!
Aragones with White Sangria Honey and Golden Raisins
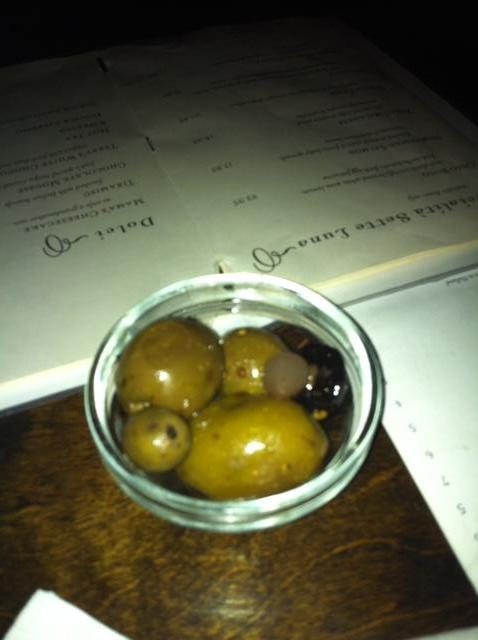
The Spanish olives came out with the cheese. I suggest getting the olives to complete any tapas meal you have at Amada.
Olives
Next came out the empanada which is stuffed with spinach and manchego on a bed of roasted peppers, artichokes, and red onions. They were oozing with cheese and they were good, but the succeeding dishes, blew this dish out of the water.
Amada's Empanada
Domenick also got the patatas bravas, which were almost like fancy tater tots with a smoked paprika aioli. They were good but also paled in comparison to the rest of the food.
Patatas Bravas
Then the Entrecote came out, which is prime sirloin sliced to allow sharing. Domenick ate it all and loved it. He said he would get it again.
Entrecote
I don’t know if this was intentional, but they saved the best for last. The Alcachofas a la Parmesana (Parmesan Artichokes) were one of the best food items I’ve eaten, and I eat a ton of artichokes. They were 3 artichoke hearts with a parmesan cream sauce and pine nuts. The artichokes just melted in your mouth, but the worst part was that 3 of these left us wanting more, much more. I would order 4 orders of these and call it a day!
Alcachofas a la Parmesana
Last but not least came out the Esparragos con trufas (Grilled Asparagus, Poached egg, Mahon Crisp and Truffles). This was also one of our favorite dishes. The shaved truffles, the perfectly poached egg, the amazing grilled asparagus, tender but still crisp! Wonderful! What brought this dish down a notch in both of our books was the Mahon Crisp, it was way too salty. I couldn’t even finish the half I broke off. This dish would have been so much better if the Mahon Crisp was just left off.
Esparragos con trufas
Although we were pretty much stuffed after this amazing meal, we decided on dessert because it just felt like the perfect way to end the night. The boy settled on the Crèma Catalana de Chocolate. It was caramelized dark chocolate custard, strawberry gelee, and berry sorbet. It was a good dessert and Dom scarfed it down.
Crèma Catalana de Chocolate
I went with the waitresses recommendation the Pastel con Escabeche, which is a warm brown butter cake, seasonal fruit escabeche, and almond ice cream. I loved the brown butter cake and the almond ice cream. The best part was the warm cake melted some of the ice cream which combined with the escabeche to make a wonderful sauce. I’m beginning to realize that I love warm cakes on cold winter nights!
Pastel con Escabeche with a bite missing
At the end of the meal the waitress brought over a almond crisp and it was very tasty, I just wish I wasn’t as stuffed and I could enjoy more of it.
Almond Crisp
Overall it was a great date night and wonderful food. I would recommend Amada or any of the other Garces restaurants.
Amada
217-219 Chestnut Street
Philadelphia PA 19106
215-625-2450
I decided to make something for my bosses baby shower at work and I knew sugar cookies would be the perfect treat. I found these sugar cookies on allrecipes.com
. I love that they were simple and easy to make, but still tasted delicious.
Ingredients:
2/3 cup of vegetable shortening
2/3 cup butter
1 ½ cups sugar
2 eggs
2 tsp vanilla extract
3 ½ unbleached all-purpose flour
2 tsp baking powder
1 tsp salt
1/3 cup decorating sugar
Preheat oven to 350 degrees. In a medium bowl, cream the butter, shortening, and sugar. Add the eggs and vanilla and beat until smooth. Combine the flour, baking powder and salt and beat into the mixture until the dough comes together. Roll dough in the palms of your hands into walnut sized balls and roll the balls into sugar and bake on a cookies sheet about 2 inches apart. Bake cookies 10 to 12 minutes until bottoms are light brown. Remove from baking sheets and cool on wire racks. This makes about 24 cookies.
I had an amazing night at the TopChef Premier Party. It started off with meeting Jen Carroll and Kevin Sbraga when I walked into 10 Arts Lounge! Awesome! Then Brian from Bridges Burgers and Beer arrived and we ordered cocktails. I had the Maple Ginger Press which is a martini with tequila, grand marnier, pineapple juice and maple syrup yumm! Brian had the Ri-Pear which is a martini with muddled pears, grey goose la poire and white cranberry juice. I tried his, but I preferred my martini, I love tequila and maple syrup and they go fantastic together. I have a feeling I will make pancakes with tequila laced maple syrup in the near future!
We sipped our drinks until it was time to move onto dinner at the 10 Arts restaurant. Chef Jen was doing a TopChef tasting menu of 4 of her dishes on TopChef, which is what Brian got and I ordered a few of our waiters vegetarian recommendations.
For the first course, Brian had the clam ceviche. It looked amazing!
Clam Ceviche
For the second course Brian had blue bay mussels and I had celeriac soup with roasted mushrooms and jus. The soup was fantastic and took me back to my mom’s homemade cream of mushroom made with wild mushrooms. It was creamy and perfectly seasoned.
Blue Bay Mussels
Celeriac Soup
For our third course Brian had Halibut and I had the casserole of seasonal vegetables. It was a small dutch oven with perfectly roasted diced veg, including squash tomatoes and eggplant. It reminded me of a ratatouille with a little spice! Perfect for a vegetarian! I would get this and soup or salad and call it lunch or dinner any day!
Halibut
Casserole of Seasonal Vegetables
For our Fourth course Brian had snake river Kobe skirt steak and I had a special vegetarian pasta dish. It was eggfettuccine (I highly suggest you have them once in your life) they are so much lighter than normal fettuccine, like a smaller paperadelle pasta. The sauce was rich and creamy (I think they’re may have been a hint of saffron in it, and there were sundried tomatoes and wonderful wild mushrooms. I loved this pasta and would love to have it again, but the veg dish of the night changes from what I’ve heard.
Kobe Skirt Steak
Fettuccine
After dinner we went back to the kitchen to visit the awesome pastry Chef at 10 Arts, Monica Glass. Brian and I loved the kitchen! It was such a treat to go into the kitchen.
After we were done in the kitchen we sat down for our fifth and final course, DESSERT! Brian’s tasting menu came with reinterpretation of Smore's: soft chocolate, pomegranate, toasted marshmallow and graham cracker ice cream (a favorite dessert of Chef Jen’s) and I choose her Beignets because I’ve heard wonderful things about them. She also sent out pettis fours for each of us and the special dessert of the night, spice cake with sour cream ice cream and persimmons.
Beignets
Smore's
Pettis Fours
Spice Cake
The smores were fantastic. The beignets were the lightest donuts I’ve ever eaten and they just melted in your mouth! The pettis fours were delicate and delicious; there was a brownie, mint macaroon, and a ginger bread cake. The spice cake was probably my favorite of all of the desserts because it was light and had the right amount of spice, it just tasted of the Holiday season!. It was the perfect way to end a cold night winter in Philadelphia.
I had a fantastic experience at 10 Arts! I met wonderful, friendly, and vivacious chefs and had an amazing dinner, from the first sip of my cocktail to the last bite of dessert. I would recommend 10 arts to anyone anytime. The best part about it is you can go all out and spend a ton of money there, or you can keep it cheaper by selecting soup and salad or eating at the lounge. I believe there’s a menu item that will satisfy everyone’s wallet as well as their stomachs! I hope to be back someday soon!
You may wonder what a vegetarian that does not eat faux meat eats at a meat-eaters thanksgiving feast. Well the answer is: I had plenty, actually, way more food than I needed. My sister-in-law made stuffing for me with veggie broth and there was corn, mashed potatoes, sweet potato casserole, and broccoli rabe. I also made two items I knew I could eat and that I had been craving; green bean casserole and cranberry sauce. First off, its not Thanksgiving to me without cranberry sauce and secondly, I haven’t had green bean casserole in years since I avoid overly processed foods.
When searching for my recipes for green bean casserole I took notes from Martha Stewart and Guy Fieri to create my own recipe. In the end mine looks nothing and I’m sure taste nothing like there’s but reminds me of the old school green bean casserole I used to love,. Except, much better, fresher, and better for you. I will never go back to eating the green bean casserole from canned goods.
For the cranberry sauce, I used a combo of my mom’s and one I found on allrecipes. I knew I had to incorporate spiced rum, it just seemed more festive than regular rum!
I’m so thankful for my family and getting to share Thanksgiving with them! Oh and have awesome veg items to eat at Thanksgiving!
Cranberry Sauce
1 bag of cranberries
1 cup of raw sugar
½ a peel of a Clementine, or orange zest
1 tsp of nutmeg
2 tsp of cinnamon
2/3 cup of captain morgan spiced rum
Combine all ingredients and cook until mixture is thickened and reduced. Then either leave whole or use a blender or an immersion blender to make the sauce thick and creamy. I used an immersion blender on mine. (NOTE: For the captain morgan rum it may have been more like a cup, I started at ¼ cup and started adding more and more until it tasted right)
Cranberry Sauce
Green Bean Casserole
For the green beans and mushrooms:
1 ½ lbs of green beans 4 cups
1-2 tbs of butter
1 medium onion diced
1 lb of button mushrooms sliced stems removed
1 tsp of dried thyme
Salt and pepper to taste
First put a large a pot of salted water on to boil.Next clean your green beans and if you are brave French cut them (cutting them lengthwise, note: this takes a long time and is tedious, but well worth it). Now blanch your green beans until they are tender but not mushy. Then clean your mushrooms and slice them and dice your onions. Sautee the onions and mushrooms in about 1-2 tbs of butter. After they are soft add pepper and salt to taste. Then add your green beans and your béchamel sauce and mix together. When you are ready to eat: preheat oven to 350, butter a glass or ceramic 9 x 13, and heat the mixture all of the way through about 15 mins. Then add your French fried green beans to the top and place your onion on broil just to re-crisp the onions.
Béchamel Sauce
¼ cup of butter
¼ cup of flour
2 cups of milk
Pinch of salt
Pinch of pepper
Pinch of nutmeg
First start by making a roux, melt ¼ cup of butter on low and mix in the flour. Cook it for a few minutes to get the flour taste out of it. Then slowly add your milk. Cook your mixture until it has reduced and thickened. Then season with a pinch of salt, pepper, and nutmeg.
French Fried Onion Topping
1 onion thinly sliced
1 cup of milk or enough to cover the onions
A few splashes of Tabasco
4 cups of canola oil
Flour for dredging:
1 cup of flour
Salt and pepper
Pinch of paprika
First thinly slice your onions, I recommend using a mandolin if you have one, I couldn’t find mine so I sliced them by hand. Soak the onions in the milk and Tabasco mixture for a few minutes and then dredge in the flour mixture. When your oil is ready (bubbles at the end of a wooden spoon) start frying your onions in batches. Once you take them out of the oil let them drain and cool on a paper towel. Once they are cooled if you are traveling you can put them in an air tight container. This makes a really light and crispy onion.
Green Bean Casserole after we already dug in
All together the green bean casserole was a HUGE hit and the people who liked cranberry sauce enjoyed my rendition. So it was a success, another happy thanksgiving.
My husband and I ate at Sette Luna for our first wedding anniversary, which was about a month ago, but I just had to post a review since I fell in love with his restaurant. We decided to eat at Sette Luna after hearing rave reviews and the restaurant definitely lived up to its expectations! It was phenomenal! We started at the bar because they do not take reservations and we were definitely going to wait. We got drinks at the bar, which was really nice. My husband had white wine and I had a dirty martini. It was one of the best martini’s I've ever had. Then before we knew it we were ready to be seated. After we received our menus they brought us complimentary olives, Delish! More restaurants should offer olives or peppers instead of bread or just bread. For starters we had to try the pizza, since we’d smelled while sitting at the bar. We decided on the Torino Bianca, which is evoo garlic pesto, potatoes and parmigiano regiano. It came out super crisp and absolutely divine! The crust is super thin and the pesto and potatoes blend perfectly. It was a little garlicky for a date night but my husband and I don't mind that. This pizza is a must try! We didn’t finish the whole pizza since we wanted to try more of the menu. Next, I got the arugula salad and it was a perfect salad in my eyes. I love simple ingredients that let the greens shine and this salad was perfect in my eyes. It's a bed of arugula dressed in evoo salt and lemon and topped with shaved Parm! Yumm! For dinner my husband had the Bistecca which is grilled NY strip topped with gorgonzola, he opted to get risotto on the side instead of the spinach salad (he’s not really one for greens) and he said it was amazing! I had the Agnolotti con Zucca aka butternut squash ravioli. I asked if this was vegetarian and they said it wasn't but they could use pasta water instead of chicken broth for the sauce. It was good but I could see how the chicken broth would make this dish amazing. The table next to us had the homemade fettuccini one with bolognaise and the other with Alfredo sauce. I will definitely try the Fettuccini Alfredo on my next visit, which hopefully is soon. I really wish I still lived in the area because they are bringing in some wonderful restaurants and this is a must try!
I love risotto but have been intimidated to make it for awhile. The last good risotto, was the best I’d ever had. It was made by my husband’s aunt in Italy when we were visiting and it was perfect. She made it with porcini’s and it was divine. I was going to attempt making this but never got the guts to do so, so I put it off. I have had risotto since then but it hasn’t been good so I figured I needed to attempt my own. I was planning on making butternutsquash ravioli but I ordered them at a restaurant a few days before, so I figured a risotto would be perfect. I couldn’t find a recipe I liked so once again I created my own.
6 cups of vegetable stock (I used homemade) or chicken stock
1 ½ tbs of butter or butter substitute
2 cups of aborio rice
3 cups of butternutsquash (peeled, seeded, cut into ½ chunks and roasted
2 tsp of nutmeg
Salt to taste
2 tbs of fresh sage
First Peel and seed your butternutsquash. You can either roast it in halves like this or cut it into chunks and then roast it. I was going to cook the squash in the risotto, but I changed my mind so mine was cubed and then roasted, just plain no evoo or s&p.
Begin the risotto by heating your vegetable broth. Once it is warm put the butter in a large pan. When the butter is melted stir in the rice, make sure the rice is completely coated and brown for a minute, while stirring. Ladle in ½ cup of veg stock and stir until it is absorbed by the rice. Repeat ½ cup at a time until the rice is cooked and creamy, about 40-45 minutes.
Add the nutmeg and salt to the rice and stir. Next add the butternutsquash to the pan and mix together. You can either stir the sage in at this point or use the sage as garnish. I stirred it in because I Iike the flavor.
It was not as good as the mushroom risotto in Italy, but my aunt has been making that for years, so I could never expect to outshine her on my first attempt, but it was good. The nutmeg and roasted butternutsquash gave it perfect sweetness and the arborio rice with the stock made it so creamy and beautiful and the sage added the perfect amount of freshness to the dish.
I did not have parmigiano reggiano cheese so I did not add any, but it would be great with this risotto. Also, by omitting the cheese and the butter this dish is vegan. For you meat-eaters out there feel free to use a chicken stock with this because butternutsquash pairs wonderfully with chicken stock.
So I’ve tried a ton of veggie stocks but none of them appeal to me. For some reason they all taste like the cardboard box they come in. My only solution was to make my own vegetable stock. I’ve been making beef, ham, chicken and turkey stock since I was a little girl so I knew how to make a stock. I also found an interesting article in vegetarian times that suggested I keep away from broccoli and other items that can overpower a soup. It’s a great article and I highly suggest reading it. However, when it comes to a stock I believe there are certain must haves: celery carrot and onion, which is also known as a mirepoix in French cooking. Then by adding other veggies and aromatics you can create any type of broth you desire. I wanted to make a large batch and freeze into single servings so that I could use the stock more than once so I kept mine as simple as possible.
6 ribs of celery
2 whole onions skins removed and cut in half
7 small carrots (use your judgment here mine were very small so I could have even added more but sometimes 3-4 will be fine if you have the large ones.
2 leeks just the white part cut in quarters
12 cloves of garlic smashed and peeled
2 large potatoes washed with skins on and cut in half
1 ½ tsp of pepper corns
2 tsp of sea salt
A bunch of fresh parsely
A bunch of fresh oregano
A bunch of fresh savory
20 cups of water
Now keep in mind that while cooking this isn’t going to smell wonderful, unless you like the smell of boiling vegetables. Remember if you add an animal to the mix, ie chicken it may even smell worse, but the end result is fabulous!
For you meat eaters you would add your meat to the stock and just make sure the meat is fully cooked, which will be when the juices run clear.
Now bring this mixture to a boil and after its boiling turn it down to medium for 45 minutes to one hour until the veggies are tender. Try not to simmer until the veggies are mush because straining will become much harder. Once the veggies are tender turn the stove off and strain your soup.
I strain my soup two ways. The first with a large colander to get the large pieces of veggies out and then with a small mesh strainer to get all the bits of onion and potato and full peppercorns out. Then I completely cool the stock before I portion it out and freeze it. This will last a long time and trust me this is still much much better than any canned or boxed broth you can get.
Now I keep the potatoes and carrots because frankly I love boiled soup potatoes and carrots and have grown up eating them. Plus it pains me to throw away perfectly good vegetables. Heck feed them to your dog if you want. You can even eat the celery and onion if you desire, but I do not. I like to separate the potatoes and carrots from the other items which I discard and allow them to cool a bit. Then I will eat them that night and later for leftovers with just some salt and pepper and sometimes with mustard chow-chow (picked veg in mustard) it’s a PA dutch thing that everyone must try at least once!
I’d been eyeing up Zakes for months, but hadn’t had a chance to go. I finally went last week and it was wonderful. My friend and I went there for our lunch break from work. When we got there we were nervous that it was going to take too long because it was packed but they got us our food quickly without skimping on quality. First they came out with delicious homemade breads, honey wheat (my fav), white, and focaccia. I'd go back to Zakes just for the bread itself. For a drink I had a half and half (half lemonade half iced tea, both of which are homemade) it was delicious. For lunch, I had the onion, spinach, and brie quiche. It was very good and the side salad completed the meal. My friend had the jumbo lump crab meat sandwich, which came on their homemade bread and was real crab meat. She said it was wonderful. If I were still eating fish I’d definitely try this. Their sandwiches come with a side salad and a side of potato salad. I really wish we had room for dessert because they looked amazing. I will definitely be back and I will get dessert next time.
I used Tofurky’s Sweet Italian with Tomato Basil “Sausage”
I brushed the tofurky sausage with a little evoo and then cooked it on the grill but it didn’t get great grill marks.
For the peppers and onions I just sautéed them with evoo and then seasoned them with S & P.
I used a whole grain bread from whole foods that I cut to size to serve the sausage and peppers.
I have to say I was expecting the flavor of a pork sweet Italian sausage, but I definitely got the flavor of a chicken sundried tomato sausage. I’ve never been a fan of chicken sausages so I will not be buying or eating this again, but for those of you who like sweet chicken sausage this is a perfect product. The next time I’m craving sausage and peppers I’ll probably just eat peppers and onions on a roll and call it a day.
I always have bananas in the house, we all love them even Rigley (our dog). Unfortunately, we don’t always eat them fast enough and they go bad. I normally make banana bread, banana pancakes, or my mom’s banana cake but I wanted something different this time. So I looked on the internet on the Joy of Baking website and came across a recipe for Chocolate Banana Cake! The only thing I changed is that instead of making a ganache I made Chocolate Buttercream.
Ingredients:
2 cups of sugar
1 ¾ cups of all purpose unbleached flour
1 ½ tsps of baking soda
1 ½ tsps of baking powder
½ tsp salt
2 large eggs
2 medium bananas , mashed
1 cup of warm water
½ cup of milk
½ cup of canola oil
2 tsps of vanilla extract
Method:
Preheat the oven to 350 degrees F. Grease or spray a 9 x 13 inch pan. Set aside.
In a large bowl whisk together the sugar, flour, cocoa powder, baking powder,
baking soda, and salt. Set aside.
In another large bowl, whisk together the eggs, mashed bananas, water, milk,
oil, and vanilla extract. Add the wet ingredients to the dry ingredients and stir,
or whisk, until combined. Pour the batter into the prepared pan and bake for about 30 t0 35 minutes or until a toothpick inserted in the center of the cake comes out clean. Remove from oven and let cool on a wire rack. When completely cooled, frost with the chocolate buttercream.
It was definitely a hit. My parents loved it, my husband loved it, my coworkers loved it and I loved it too. This will be a recipe I use again! Thanks a bunch Joy of Baking!
I’ve been to Aruba several times, but this is the one dish that has stayed in my mind. So I just had to blog about this dish.
The first time I had this was a few years ago when we went to Aruba with my then boyfriend, now husbands, parents. It was the first time they were in Aruba and they have this dish every year when they go back. Domenick and I loved it so much that we had it twice while we were there this time, but prepared at two different places, Gianni’s and Sole Mare. Personally I preferred Gianni’s but I also was sick at the time we ate at Sole Mare.
The pasta is served for 2 or more people and trust me if one person gets it the other person would have wished they got it anyway! First they bring out parmesan wheel on a cart. Then a server brings a flaming ladle of whiskey and a pan full of pasta in a sauce with fresh tomatoes. The ladle of flaming whiskey is dumped into the parmesan wheel and begins to melt the cheese and turn it into a creamy gooey lovely sauce. Once the server has scraped all of the cheese they add the pasta and toss it with the flamed whiskey cheese sauce and viola you have the most amazing pasta dish ever created! The dish that is most similar that most of you would be familiar with is pasta with vodka sauce, but for me, it’s much better! You cannot taste the whiskey, but the way that flamed whiskey melts the cheese is just amazing. I literally could just eat that with a spoon, yumm!
The thing about this dish is that they claim it is an authentic Italian dish. However, I’ve never seen an Italian cook with whiskey and I researched it a bit but couldn’t find anything. So I guess I’ll just take their word for it. All I know is that it is more of a traditional way of making a “cream sauce” in Italy. Now we add actual cream to our vodka and alfredo sauces but the traditional way was to add a TON of parmesan and toss it with some hot pasta and hot pasta water pasta water or vodka sauce.
If you find yourself in Aruba this is the number one dish I recommend!
I am planning on creating my own version of this dish so stay tuned to see how it turns out.
The Whiskey added to the parm wheel
The waitress scraping the cheese after the whiskey melted it
The spaghetti being mixed with the cheese
We were too hungry to take a picture after it was plated so this is about halfway through
This blog is entirely dedicated to my wonderful dog Rigley. He is more than a dog he is a member of the family. It is Rigley’s Birthday on Thursday and we are going to Aruba so I wanted to celebrate early this year. He will be turning three and those are some of the best years of my life. He truly is our best friend and we love him. The following are recipes for dog cookies, dog cupcakes and human cupcakes, in celebration of his birthday.
Last year I made dog cookies for Rigley and Teddy for Christmas. So I figured I would make some more cookies for his birthday. The reason I love these cookies is that they are 100% natural and I don’t have to feel guilty for giving them to him. They are so simple to make and they actually smell wonderful! I honestly don’t remember where I discovered this recipe but I actually altered it a bit so now it’s my recipe! If you have a dog or you ever need to get someone’s dog a gift these are perfect.
Rigley’s Peanut Butter Cookies
Ingredients:
2 Cups of whole wheat flour (I used organic 365 brand)
1 tbs of baking powder
1 cup of room temperature peanut butter (I used unsalted creamy organic 365 brand)
1 cup of skim milk, almond milk, coconut milk, or water (I used organic almond milk)
Method:
Preheat the oven to 375. In a bowl combine flour and baking soda and in another bowl combine the PB and milk. Add the dry ingredients into the wet ingredients. It is much easier to mix with your hands considering you have to knead the dough with them. I do this in a bowl, but you can also do it on a floured work surface. Once mixed and kneaded the dough will be like a biscuit consistency. Make sure you have a large floured work space where you can roll the dough; I used a large sil pad (silicone baking sheet). Next take about ¼ or a 1/3 of the dough depending on the surface area of your floured work space. Roll out the dough to ¼ inch thickness and cut into shapes. I used a medium and small dog bone cookie cutter but any cookie cutter will do. This takes some time and energy and if you just want it to be a quick process I would suggest just rolling out the dough and cutting it into squares using a pizza cutter. Place your cookies on a greased baking sheet and bake twenty minutes or until light brown; you do not want to burn these. Cool on a baking rack and store in an air tight container. It makes about 30 cookies depending on the size you make them.
Medium cookies ready to be baked
Small cookies baked
You may want to modify the recipe depending on the size of your dog. If you have a small dog you may want to roll the dough a little thinner and use a smaller cookie cutter. If you have a large dog you make want to use a large cookie cutter and roll out the dough even thicker. These cookies have no preservatives so if you have a small dog I suggest cutting down the batch, freezing them, or sharing them.
Since many pet parents do not cook or bake for pets I feel there is a great need for me to explain the ingredients. The reason I used whole wheat flour is that it is better for your dog than refined white flour and will keep your dog fuller longer. Also, dogs aren’t supposed to have dairy so I normally research what is safe for dogs before I cook or bake. Here is a helpful website http://www.aspca.org/pet-care/poison-control/people-foods.html. If you do not see a particular item that you are interested in feeding your dog just look up the ingredient and see if it is safe. I know almonds and coconut are safe so their milk is safe to dog consumption, if you are worried I would just use water, which is cheaper and easier! Trust me your dog will love them for you and they are so much cheaper to make than buying good natural dog treats.
I knew I wanted to make Rigley cupcakes for his birthday so I decided to research recipes on the internet. In the past for his birthday I have bought him a large dog cookie or dog cookies that look like cupcakes but they take him a long time to eat because they are hard and made for larger dogs. Plus he tends to make a mess because they are always decorated with carob.There were a ton of choices for dog cupcakes, some with meat products, some with carrots, they all sounded “good” for a dog, but one that caught my eye was made with bananas. I know Rigley loves bananas so I figured they would be a great for him.
Rigley’s Banana Birthday Cupcakes with Peanut Butter Frosting
Ingredients:
2 cups skim milk, almond milk, coconut milk or water (the original recipe uses water but I used almond milk since I had opened it for the cookies)
2 overripe mashed bananas
1 tsp vanilla
3 cups whole wheat flour
1 tbsp baking powder
1 egg
3 tbsp honey
Method:
Heat oven 350 degrees. In the bowl that you mashed the bananas add the vanilla, honey and egg and beat. Then add your dry ingredients and mix well. This dough is a little runny so do not add more flour, it is supposed to look runny. Scoop into cupcake pans, I used mini cupcake pans because I have a small dog but you can use the large ones if you have a big dog. If you are using mini pans bake for 10 minutes or until a cake tester comes out clean. If you are using large tins bake for 20 minutes or until the cake tester comes out clean.
For presentation, warm up a a little of the organic unsalted PB (it needs to be refrigerated and will not spread at that temperature) and ice the top of your dogs cupcake, then place a small bone PB cookie on top.
Rigley eating his birthday cupcake
Since Domenick and I wanted to join in on the celebration I decided to make cupcakes for us too. The cupcakes I made have got to be my favorite cupcakes of all time, which is bizarre because they are so simple to make. They are so delicious and the batter only makes 6-7 extra large cupcakes, which is good because I could eat a lot more of them. The way I discovered these cupcakes is ironic. My mom told me she didn’t want cake for her birthday last year. I knew she meant she didn’t want any baked goods, but since my mom does so much for me I could not let her go without something sweet on her birthday. I searched my cookbooks and looked for a recipe that would only make a few cupcakes so that my mom couldn’t get too mad at and I found them. The book is Cupcakes by Pamela Clark. They are actually called ice-cream cone cupcakes because they are supposed to be put into waffle cones and decorated to look like ice cream, but I didn’t do that so I adapted the recipe. Anyway, when we tried them on my mom’s birthday (hence the name) we were all so disappointed that it only made 6 cupcakes because they were amazing. Moral of the story, double the recipe and everyone will be happy.
Mary Ann’s Birthday Cupcakes
Ingredients:
6 tbs of softened unsalted butter
½ tsp of vanilla
½ cup of raw organic sugar
2 eggs
1 cup of flour
1 ½ tsp of baking soda
½ tsp of salt
3 tbs of milk
Method:
Preheat oven to 350. Line 6-7 holes in a large cupcake tin or 12 in a medium cupcake tin. Beat butter, sugar, eggs, flour and milk in a small bowl, either by hand or with an electric mixer on low and then increase speed to medium. I mixed all this dough by hand but just a warning it is thick heavy dough so if you have a hand mixer use it. It is not enough batter for a standard standup mixer. Next scoop the dough into the tins and smooth the surface of the cupcakes. Bake large cupcakes for about 25 minutes or until a cake tester comes out clean (I believe they may take less time so keep an eye on them). If you are using a medium tin bake for about 20 minutes or until the cake tester comes out clean. They should be a blonde color when pulled out of the oven. Next place a cake rack on the top if the cupcakes and invert to get the cupcakes out. Then use another rack to turn the cupcakes right side up to cool.
Butter Cream Frosting
Ingredients:
1 stick of softened unsalted butter
1 tbs of vanilla
1 ½ cups of powdered sugar
3 tbs of milk
Method:
Beat butter in a small bowl using an electric mixer, or electric whisk until the butter is light and fluffy. I feel the electric whisk makes the frosting lighter and fluffier. Then add the vanilla, milk and powdered sugar. Add the milk and sifted powdered sugar in three batches and mix until all ingredients are incorporated. I ended up using about a tbs more of powdered sugar because my kitchen was warm from baking all night long, but you may have to adjust the liquid and sugar ratio depending on the temperature and humidity.
Mary Ann's Birthday Cupcakes
It was wonderful to celebrate Rigley’s birthday together as a family and we all enjoyed our treats. Happy Birthday Rigley we love you!


